Restoration Of 1969 Chevelle Instrument Panel

Published: December 2, 2019
by Glenn Stracher
Butyrate Tilt rings to surround the gauges in a restoration of a Chevelle instrument panel

Over two years ago we received an inquiry from Glenn Stracher, a geologist at EGSC. He needed a plastics tube that could be fabricated and colored to function as a replacement piece for an instrument panel on a classic Chevelle restoration. Glenn gave us constant updates over this two-year restoration process and was kind enough to write the blog himself! Thanks Glenn.

CAB Butyrate Tubing

Solvent Dyed Application to an ABS Automotive Instrument Panel

Glenn B. Stracher1 and Charles J. Busada2

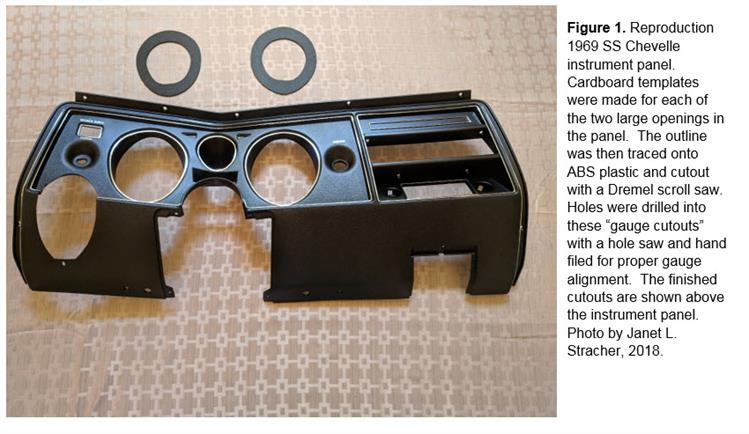
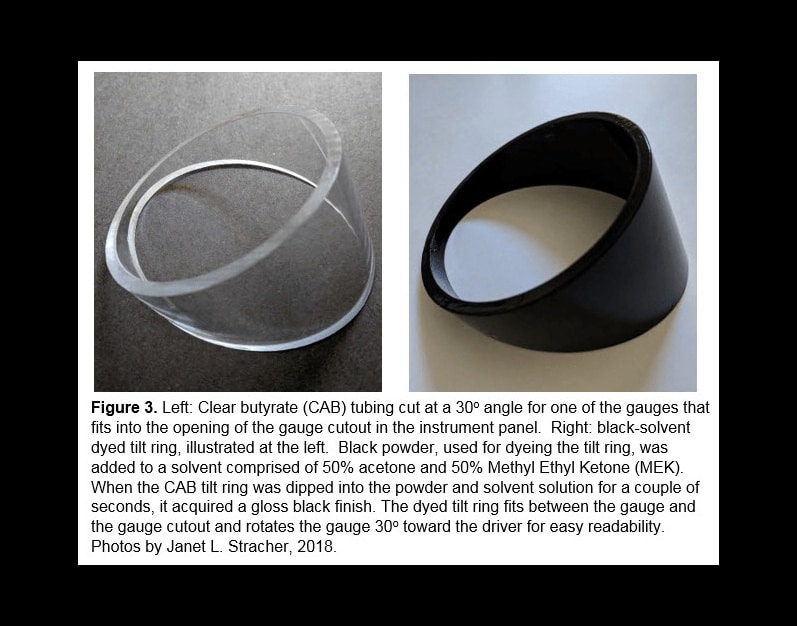
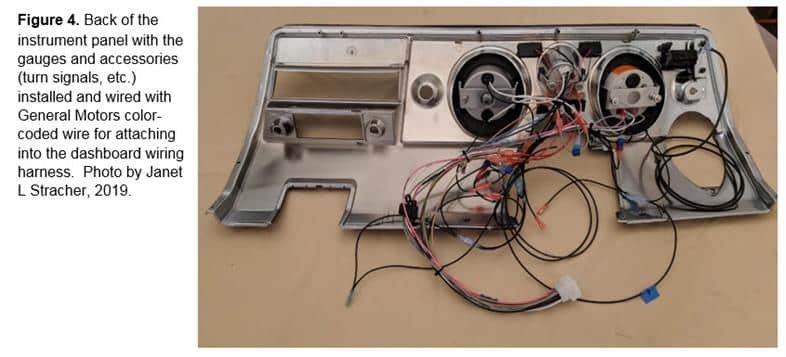
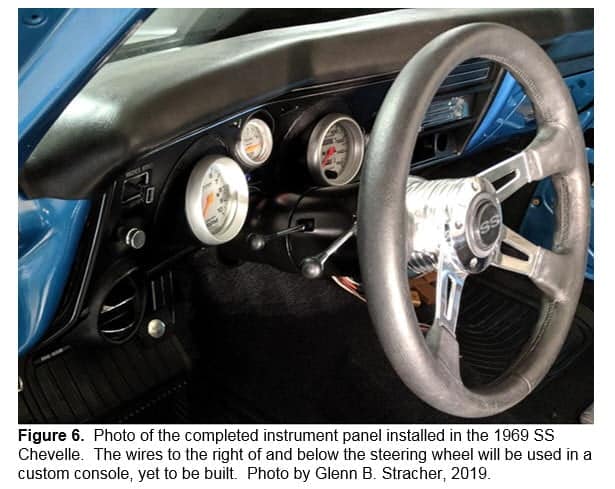
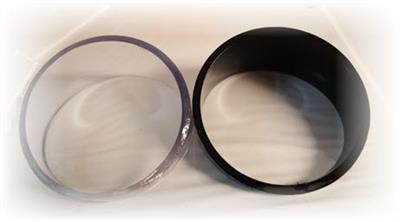
Clear butyrate (CAB) tubing is famous for its friendliness for fabrication and color dyeing. As a case in point, the first author needed automotive gauge tilt rings as part of a project devoted to modifying a reproduction 1969 Chevrolet SS Chevelle instrument panel made of Acrylonitrile Butadiene Styrene (ABS). The tilt rings needed to be cut at a minimum angle of 30° for proper viewing of the gauges from the driver’s seat. The Busada Manufacturing Corporation (BMC) provided the CAB tilt rings for an aftermarket speedometer and tachometer.

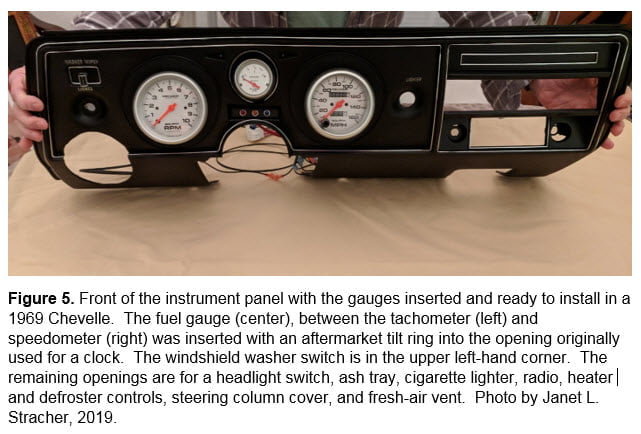
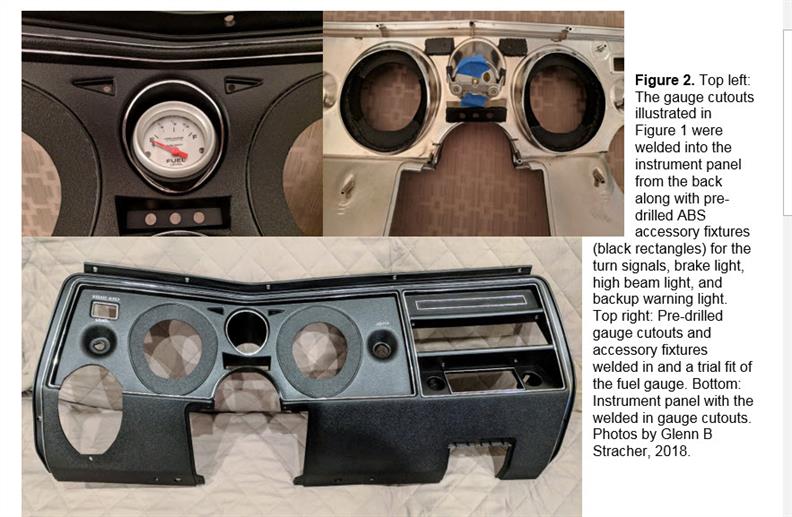
After BMC received illustrations labeled with the necessary dimensions for the tilt-rings, the company provided mitered, clear, transparent Butyrate sections for the gauges. BMC black powder, used for dyeing the tilt rings, was added to a solvent mixture comprised of 50% acetone and 50% Methyl Ethyl Ketone (MEK). When the CAB tilt rings were dipped into the powder and solvent solution for a couple of seconds, they acquired a gloss black finish. The tilt rings, combined with various ABS components welded to the instrument panel from its backside, resulted in a highly modified panel with a legible viewing angle for the gauges.

The included photos and their captions illustrate and describe the modification process of the instrument panel.
1 East Georgia State College, Swainsboro, Georgia 30401, [email protected]
2 Busada Manufacturing Corporation, Louisa, Virginia 23093, [email protected]

Caption says, "Figure 1. Reproduction 1969 SS Chevelle instrument panel. Cardboard templates were made for each of the two large openings in the panel. The outline was then traced onto ABS plastic and cutout with a Dremel scroll saw. Holes were drilled into these "gauge cutouts" with a hole saw and hand filed for proper gauge alignment. The finished cutouts are shown above the instrument panel. Photo by Janet L. Stracher, 2018.
Caption says, "Clear Butyrate (CAB) tubing cut at a 30° angle for one of the gauges that fits into the opening of the gauge cutout in the instrument panel. Right: black-solvent dyed tilt ring, illustrated at the left. Black powder, used for dyeing the tilt ring, was added to a solvent comprised of 50% acetone and 50% Methyl Ethyl Ketone (MEK). When the CAB tilt ring was dipped into the power and solvent solution for a couple of seconds, it acquired a gloss black finish. The dyed tilt ring fits between the gauge and the gauge cutout and rotates the gauge 30° toward the driver for easy readability. Photos by Janet L. Stracher, 2018.
Caption says, "Figure 5. Front of the instrument panel with the gauges inserted and ready to install in a 1969 Chevelle. The fuel gauge (center), between the tachometer (left) and speedometer (right) was inserted with an aftermarket tilt ring into the opening originally used for a clock. The windshield washer switch is in the upper left-hand corner. The remaining openings are for a headlight switch, ash tray, cigarette lighter, radio, heater and defroster controls, steering column cover, and fresh-air vent. Photo by Janet L. Stacher, 2019.
Figure 2. Top left: The gauge cutouts illustrated in Figure1 were welded into the instrument panel from the back along with pre-drilled ABS accessory fixtures (black rectangles) for the turn signals, break light, high beam light, and backup warning light. Top right: pre-drilled gauge cutouts and accessory fixtures welded in and a trial fit of the fuel gauge. Bottom: Instrument panel with the welded in gauge cutouts. Photos by Glenn B Stracher, 2018.
Caption says, "Figure 4. Back of the instrument panel with the gauges and accessories (turn signals, etc.) installed and wired with General Motors color coded wire for attaching into the dashboard wiring harness. Photo by Janet L Stracher, 2019.
Caption says, " Figure 6. Photo of the completed instrument panel installed in the 1969 SS Chevelle. The wires to the right of and below the steering wheel will be used in a custom console, yet to be built. Photo by Glenn B. Stacher, 2019.

Other Helpful Resources

Share This