Flame Polishing Provista Plastic Tubing

Published: February 10, 2017
by Charles Busada
Glossy, transparent provista PETG tubing with shine and marks from flame polishing.

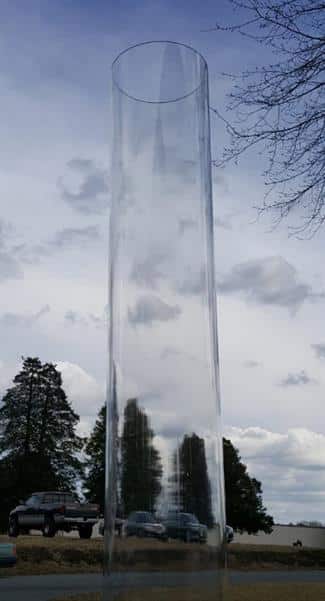
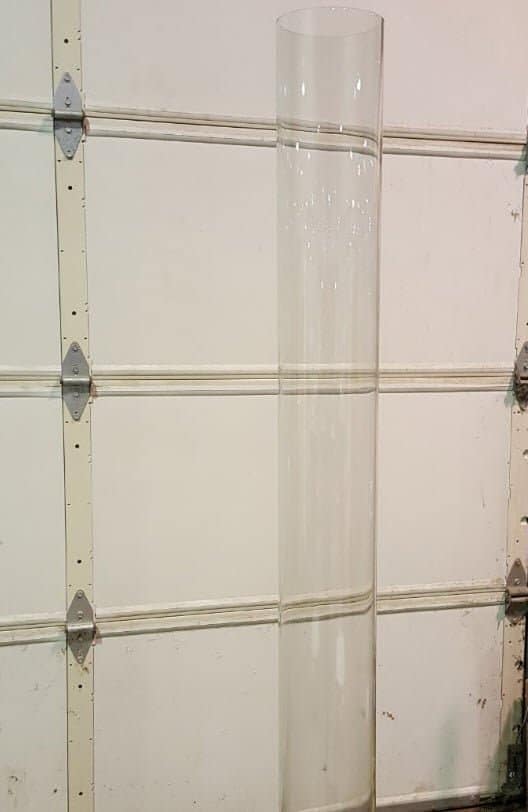
Provista (PETG) tubing, when properly extruded and polished is superior to cast acrylic in every way. When flame polished, it is spectacular for clarity. The picture above shows how a Provista tube shines when flame polished.

This 6″ OD tube, FDA approved and NSF compliant will be used for highly visible storage bins for The Roasting Plant’s coffee houses.

large, transparent, food-safe tubing seen outside.
Flame polished, food safe tubing to be used for dispensing coffee beans at The Roasting Plant

Likewise, COMCO uses a similar flame polish on their banking-system teller tubes.


Two glossy bank system pneumatic conveying tubes after flame polishing.

Also, there is the 50-50 acetone water mix.

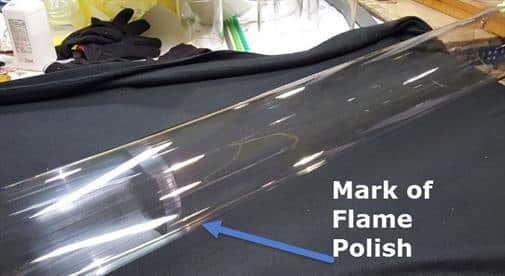
Provista tubing flame polishes well but is not a good candidate for solvent polishing. The picture to the right shows a flame polish on a 2.375″OD x .237w directly over the saw cut. You’ll see that the polish is not perfect (for that you’ll need to lathe or sand down the cut, but it is a quick improvement that takes only seconds.

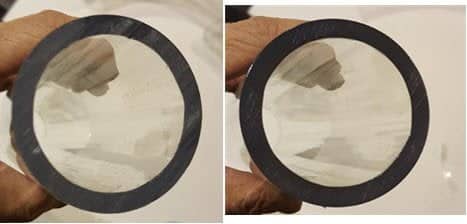
One way to fix scratches with Provista is the 50-50 mix of acetone and water. It will not fix deep scratches but does a nice job with scuffs.

Before and after flame polishing the cut edge of a tube. The "after" photo on the right shows a smoother surface.
A before and after photo showing the improved surface texture after applying solvent dip to a sheet of scratched Spectar plastic. Caption says, "Scratch repair: Simple solvent mix. 1. Mix 1 part water with 1 part acetone. 2. Submerge the part in the solution for about 60 seconds. 3. The mix will soften the plastic surface, allowing scratches to 'heal.' Do not leave the part inside the solution for more than two minutes. 4. Remove the part, rinse with water. 5. Let dry. 6. Allow sheet surface to reharden for 1 hour or more before handling. Try not to touch the surface with fingers, to avoid any risk of indentation. 7. If the dip method is not practical, you may also apply the solvent using a squeeze bottle. Flood coat the surface of the sheet with acetone/water mix, making sure all areas are covered continuously for at least 60 seconds. Rinse with water and allow to dry. The following picture shows a sheet of Spectar that was scratched over it entire surface using fine sandpaper. The right side of the sheet was repaired using the solvent dip method. Notice the dramatic Improvement!

Other Helpful Resources

Share This