It happens a lot; don’t feel bad. You may not know the exact angle, nor the radius of the bend; you just know that you need the exact replacement fast. This blog will explore several ways to identify your bend, but we start out with the most painless way devised by none other than Mr. Zaphod Beeblebrox. With this method, you need only take five measurements of your bend.

Busada Bend Analysis
Please complete the fields below and press GO:
Outside Diameter Of Tube
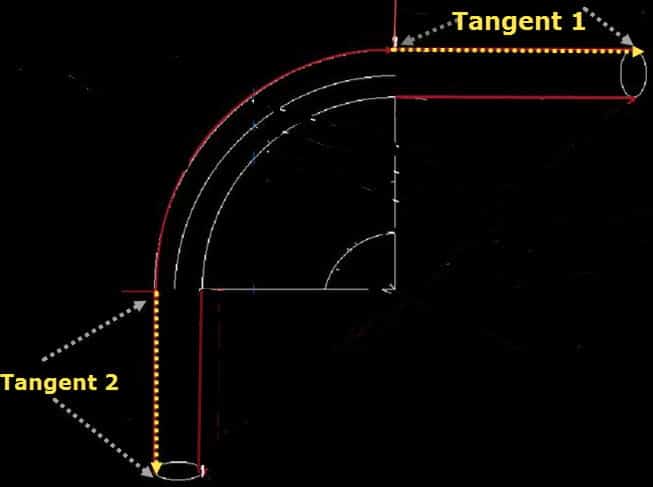
Tangent 1 (Straight tubing at ends)
Tangent 2
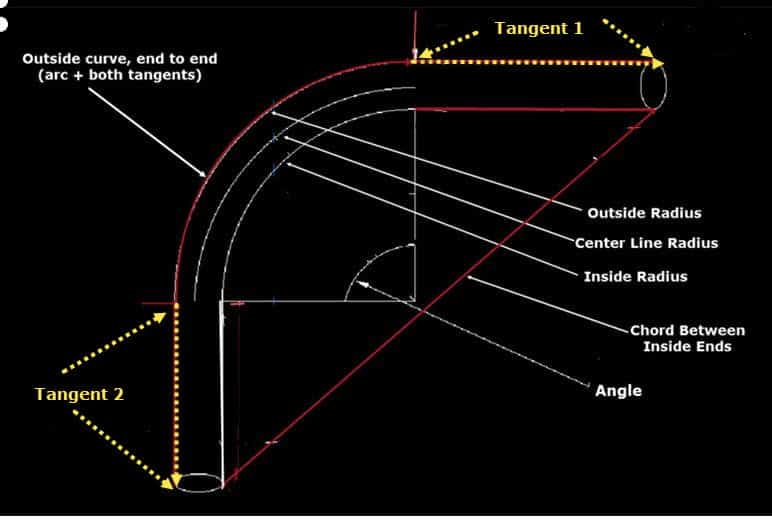
Outside curve, end to end (all along the tube, use cloth measuring tape)
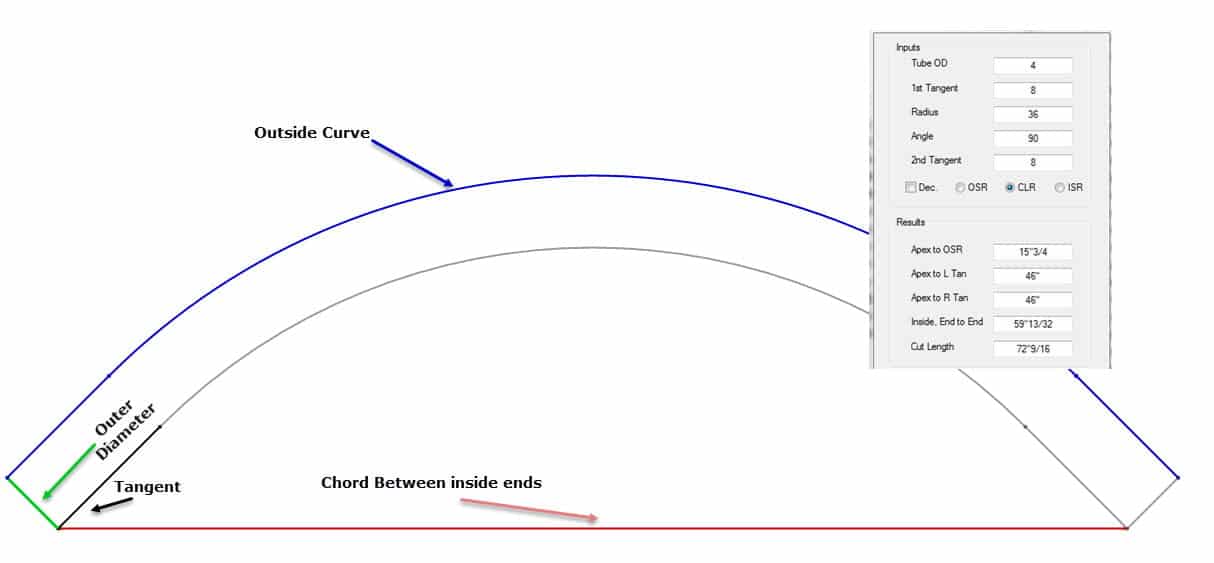
Between inside ends, Chord It’s like stringing a bow (use tape measure)
Here are the 5 measurements that you need. Follow the colors, put the measurement in the boxes, and then complete Zaphod’s Bend Analysis.
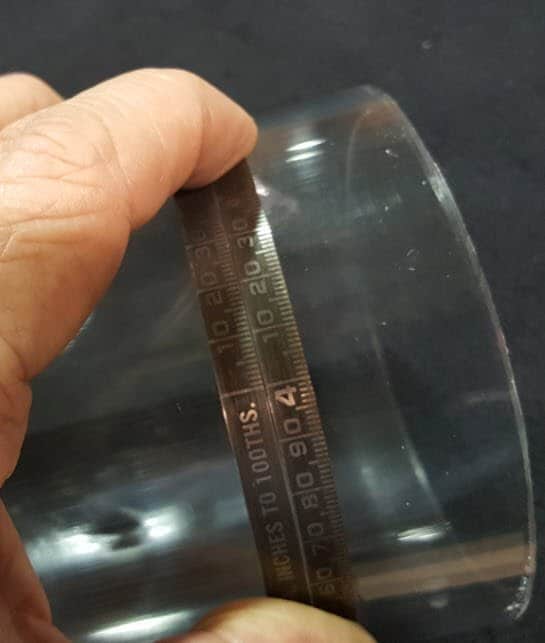
Step 1: Measure the Outer Diameter
Measurements are in yellow.
Many ways to do this . . .

Can be done on the line using a Diameter (or pi) Tape
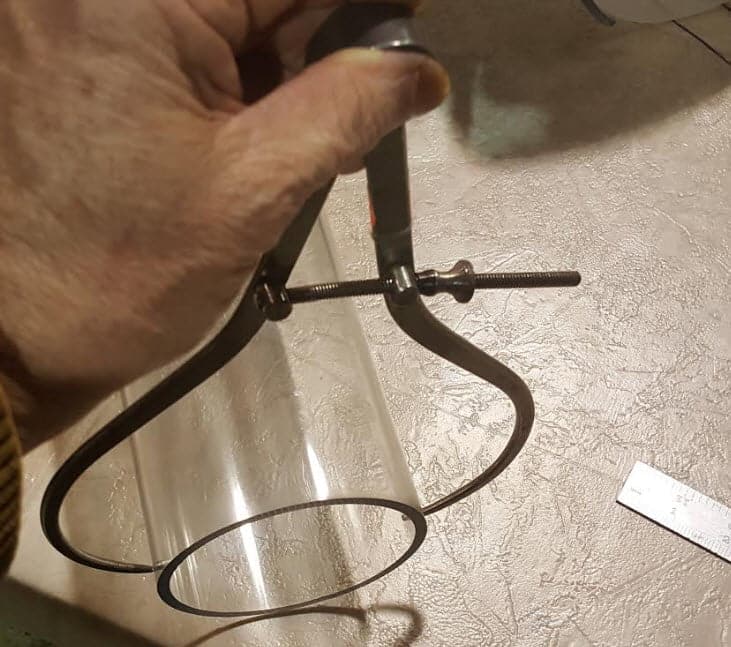
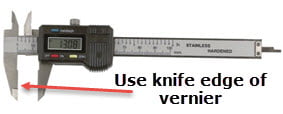
. . . or a caliper or vernier.
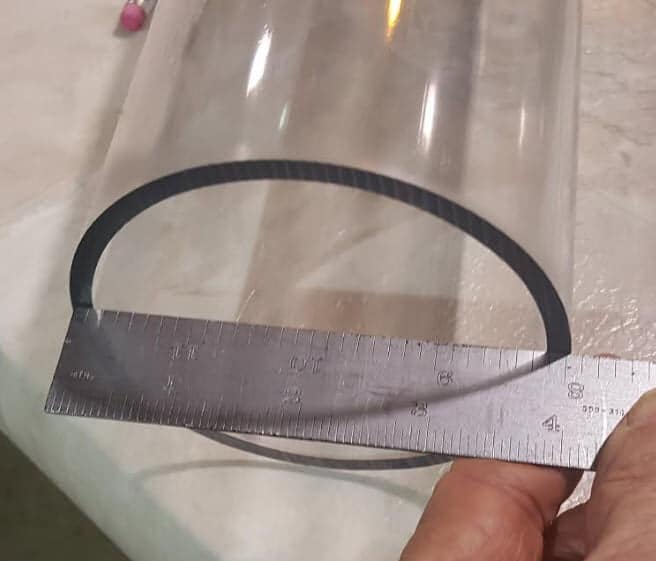
. . . or a steel ruler (off the line)
Step 2: Measure the Tangents
Measure the lengths of each dotted yellow line.
(Tangents are the straight sections at ends of bend). You may estimate tangents on the line, but best done off of the line.
Use a straight edge and slip a piece of paper in from the curved outside until it wedges.
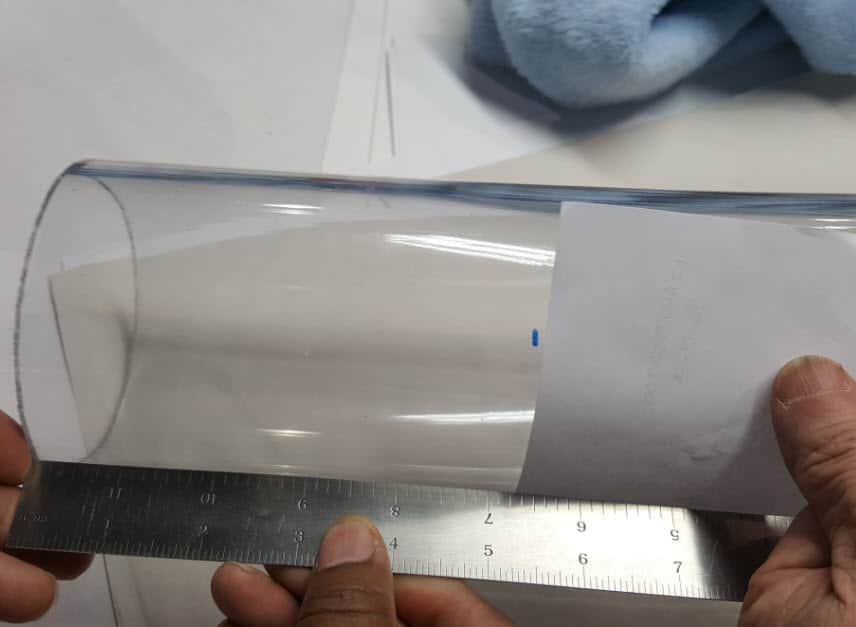
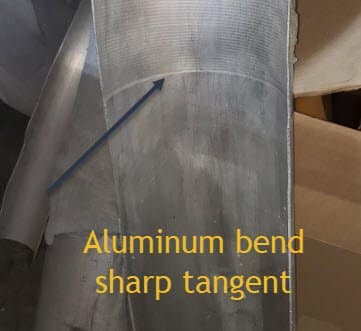
This may be your most difficult measurement as thermoplastic bends do not have sharp tangents as you may find in steel or aluminum bends.
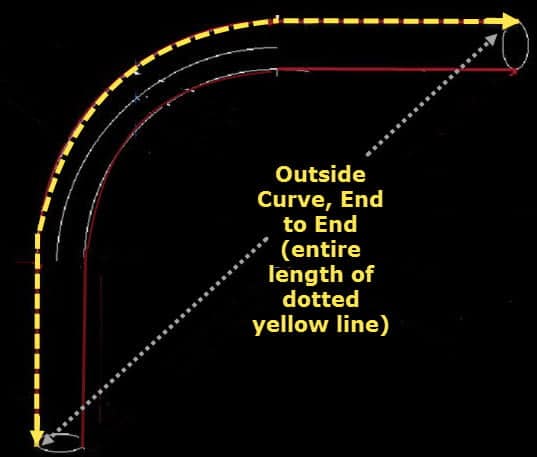
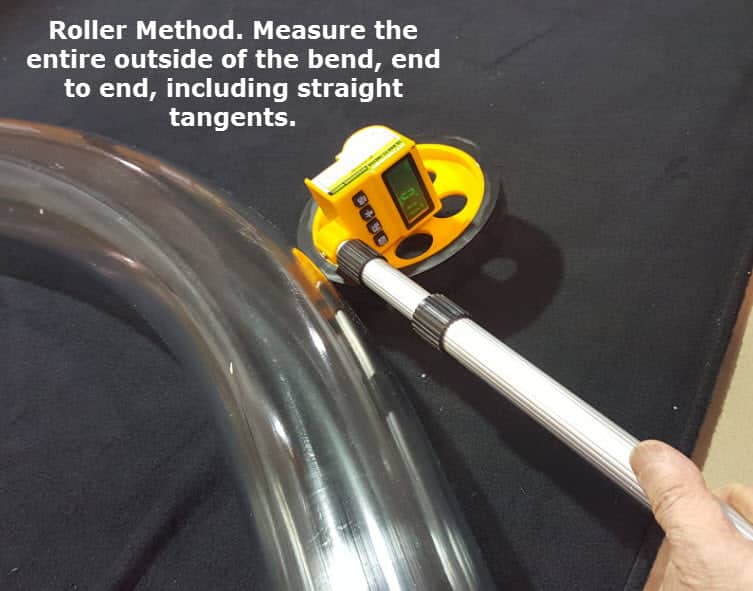
Step 3: Measure the Outside Curve
This measurement includes the outside arc and includes the tangents.
Measure the length of the entire yellow dotted line from end to end.
You can use a roller measurement.
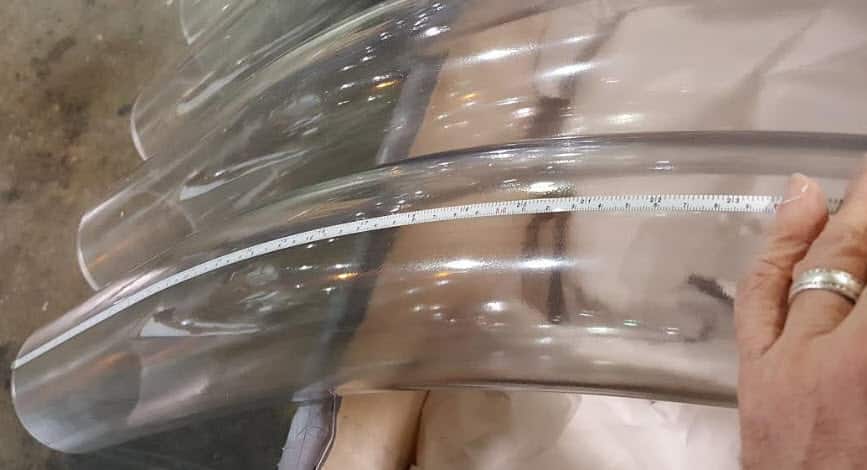
Or, use a thin tape measure.
You can use a roller measurement.
Or, use a thin tape measure.
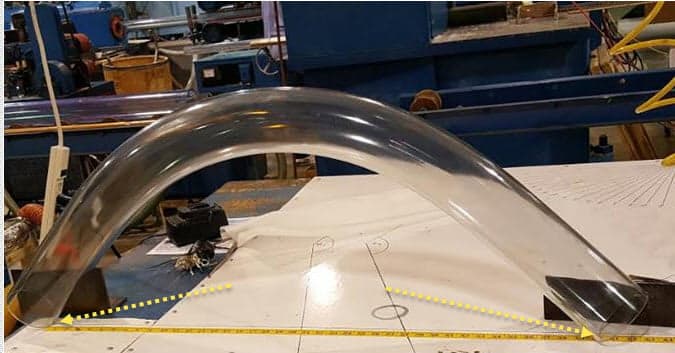
Step 4: Measure the “End to End” Distance
Measure the distance of the yellow dotted line.
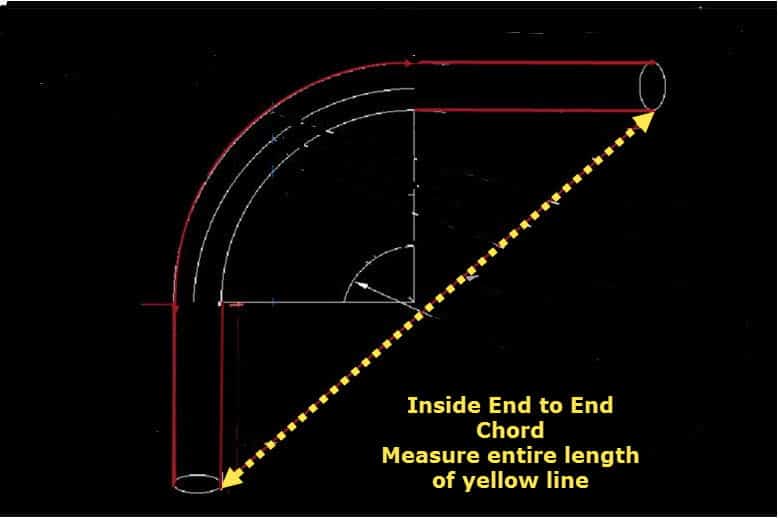
Measure the linear distance between tip to tip of the inside of the bend. Think of it as the string of the bow.
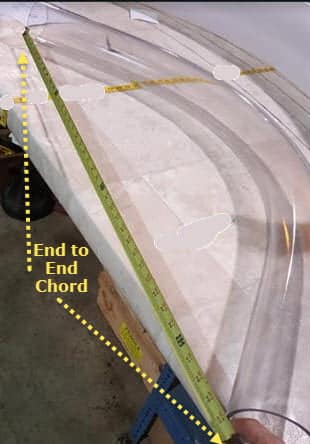
This way would be the most accurate by measuring directly on a straight tape.
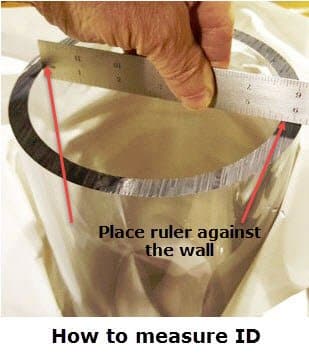
Step 5: Measure Inner Diameter
Tubing ID is important to identify if we are going to send you an exact replacement bend. There are several ways to measure it.
The first is a simple ruler measurement. Be careful to place your ruler against the tubing wall and pivot it to the place where you get the largest measurement.
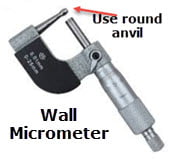
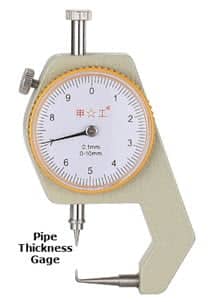
Or measure the wall directly. Compute your Inner Diameter
OD – (2 x Wall) = ID
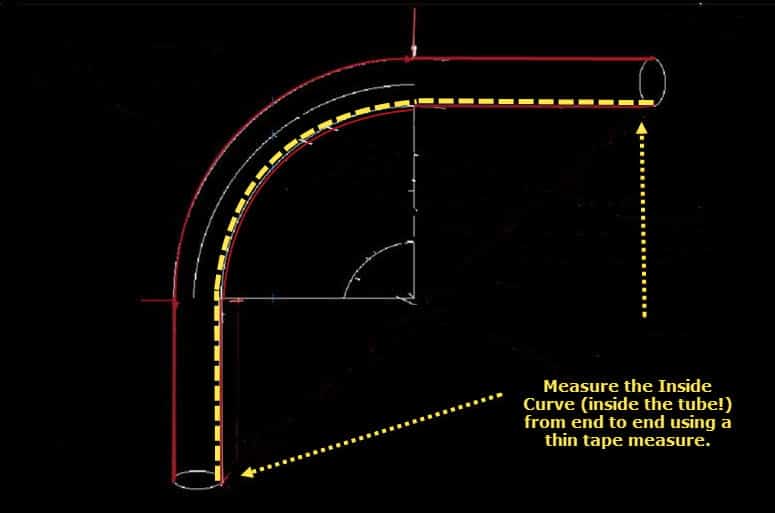
Step 6: Measure Inside Curve to Curve
This measurement must be inside the tube using a thin tape measure. This will aid us in determining your center-line radius. We must have the ID measurement above.
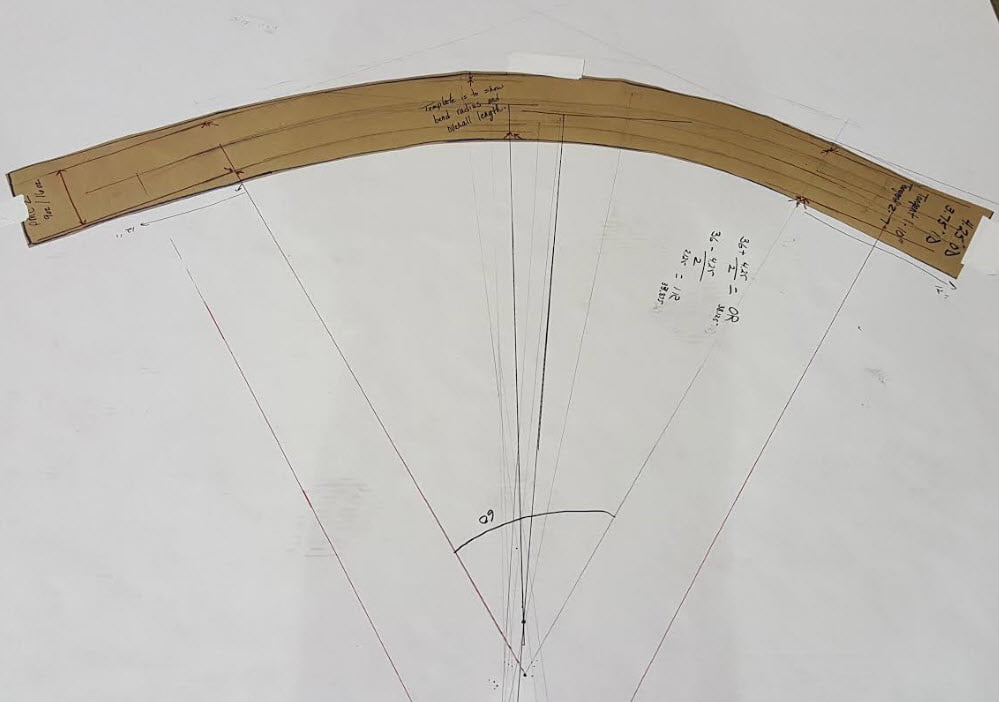
So, for a review, here are your essential measurements.
Finally!!! if you’re really frustrated, just trace out the bend and send it to us. Here we identified a 35″ CLR radius bend with a 63 Deg bend.